
THE HAIDA M10 II FILTER SYSTEM BRINGS SOME NICE WORKFLOW IMPROVEMENTS OVER THE ORIGINAL M10
by John Aldred
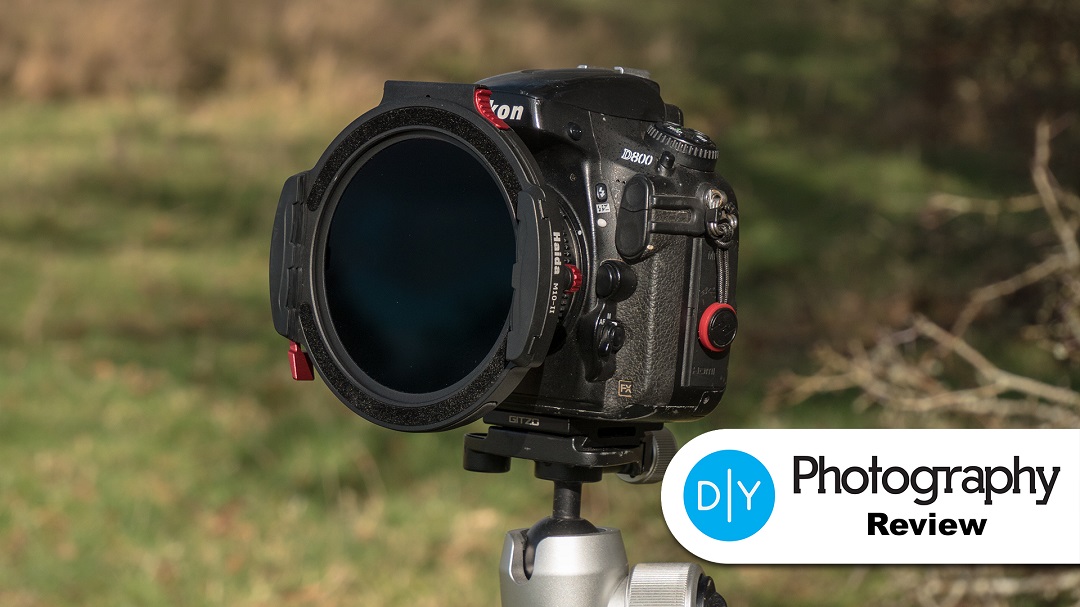
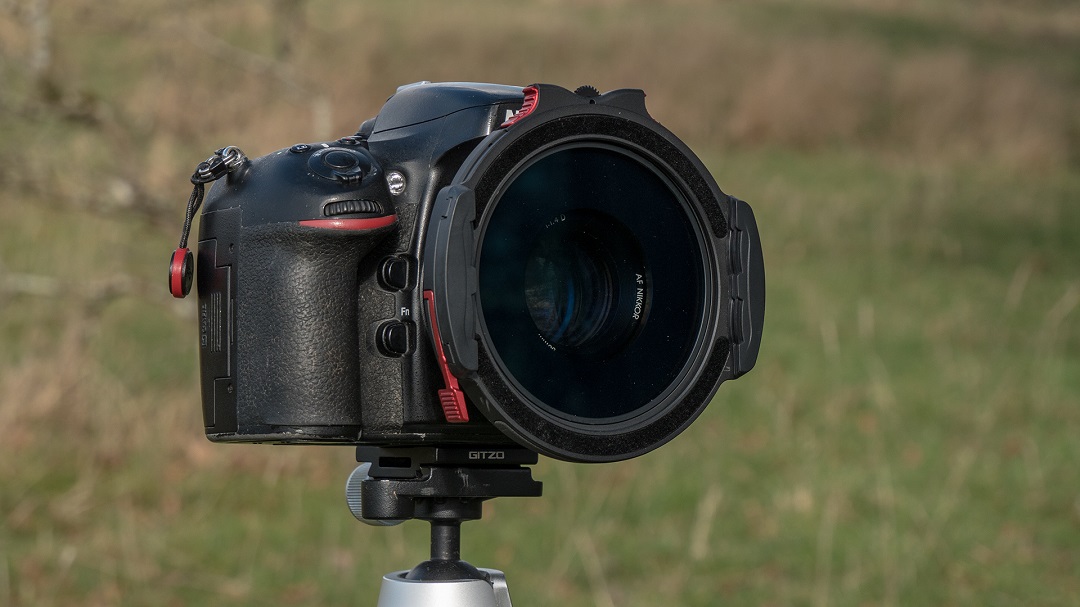
I’ve used a number of square filter solutions over the years and it’s rare that new holders are released, but that’s what’s happened with Haida, with the release of the Haida M10 II. It’s an update to the original Haida M10 (review here) and it’s not just a slight rework with a new name, but it actually comes with some pretty nice design changes and improvements over its predecessor.
First up, my overall thoughts about the original Haida M10, which you can read about here, have not changed. It’s still a fantastic holder and the M10 II takes nothing away from it, and on first glance, you’d be forgiven for thinking that the M10 II is pretty much the same as the M10, although the changes that have come with the new version make it even more of a pleasure to use.
WHAT COMES WITH IT? AN EXTRA ITEM!
As with the original M10, the M10 II comes in a nice firm zip-up case with a velvety interior to prevent damage to your holder and filter when stowed away. It’s had a slight internal redesign to account for the design changes in the holder itself, but it feels just as solid as the original.
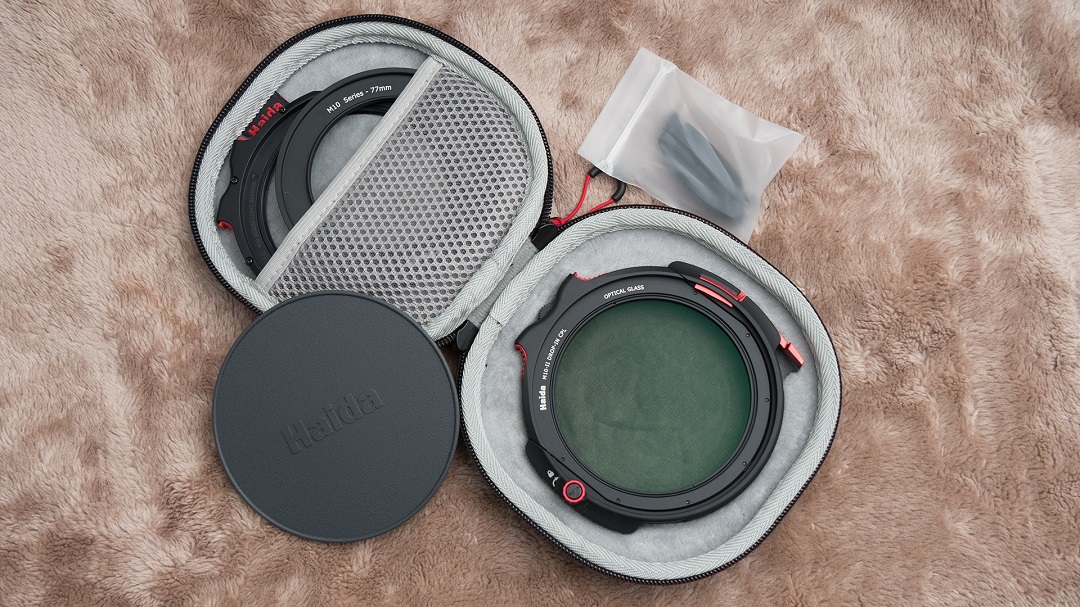
Inside it, you’ll find pretty much the same as was in the case for the M10. You get the filter holder itself along with an adapter ring (and the M10 II uses the same adapter rings as the original M10), along with an extra set of ribs for holding another filter, a circular polariser drop-in filter and an empty drop-in gasket filter for when you just want to use square filters but want to eliminate the possibilities of light leaks.
The adapter rings for the M10 and M10 II are identical, so if you’re upgrading from the original M10, you don’t have to order new ones!
One extra feature found inside the Haida M10 II box, though, that wasn’t in my box with the original Haida M10 is a lens cap that slots over the adapter ring so that you don’t have to keep unscrewing it from your lens each time you remove the filter.
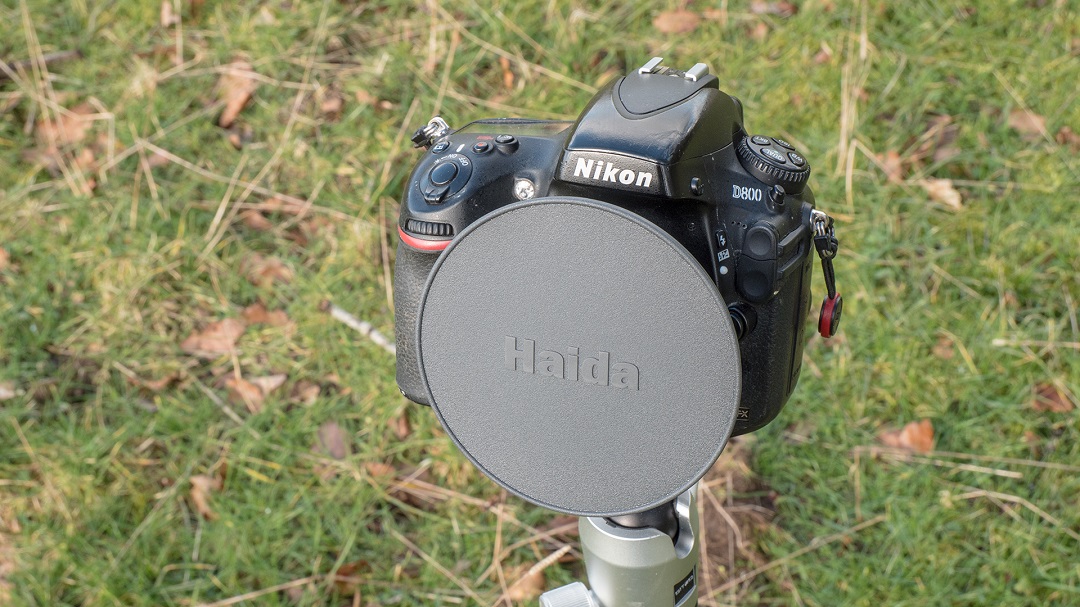
The new Haida lens cap attaches directly onto the M10 adapter ring and holds very firmly.
This is a very thoughtful addition to the basic kit and one that has proven to be quite invaluable. Now, I can just put the adapter ring onto the camera and pop on the cap before I leave the house so I don’t need to try fiddling around screwing threads on when out in the (typically) cold weather.
FIRST USE AND THE FIRST BIG CHANGE
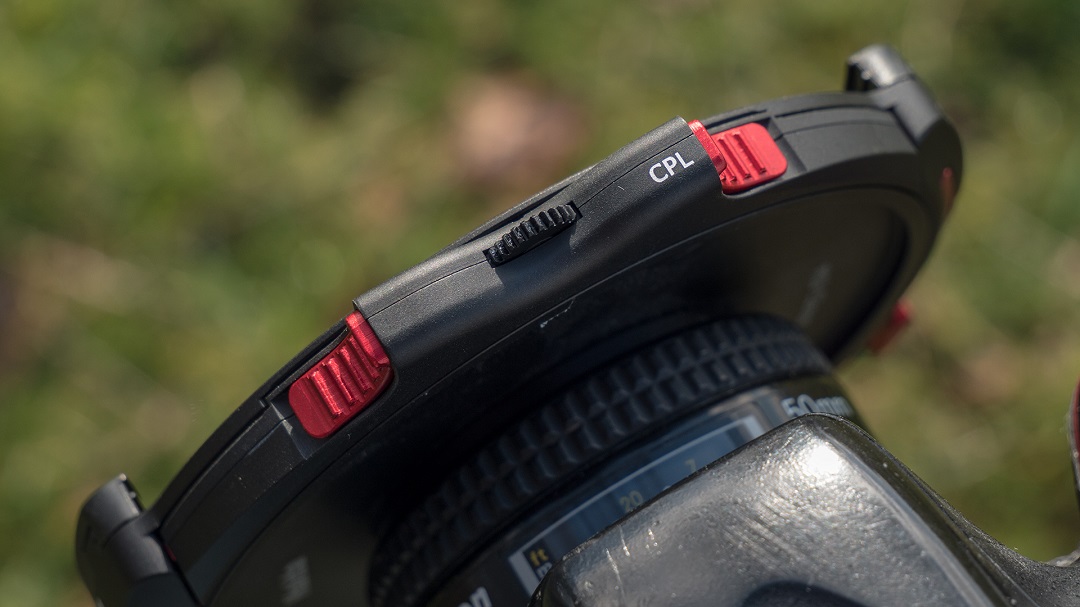
My first use with the Haida M10 II was pretty much like it was with the original M10, except with an added bonus. Both filter holders “hook” onto one side of the adapter ring and then a lever locks it onto the other. And this is the first design change between the two filters.
On the original Haida M10, you had to pull out the lever to lock and unlock the holder onto the adapter ring. While this was fine, it did mean that to minimise the chances of dropping the filter, you needed to use two hands to remove it. That meant your camera would ideally still be on the tripod and you’d have to then pick up your case and pop the filter holder in – assuming you could find somewhere to set the case down handy without it getting covered in mud or mess from the ground. Sure, you could rest it on your bag on the ground, but if something’s going to slip off and fall into the mud, it’s almost always a protective case just as you’re about to use it to put something away.
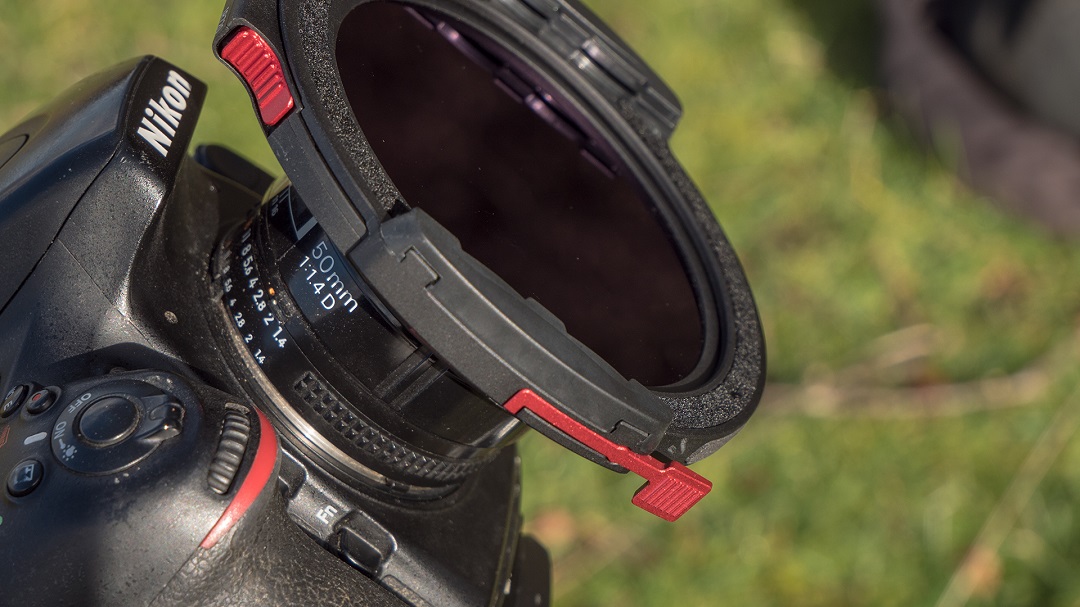
Instead of a “pull” lever, the M10 II now uses a “push” lever, making it much easier to remove one-handed.
With the M10 II, it’s now a push lever. While it seems like a tiny change, physically it means that you can now attach and remove the filter holder from your camera with just a single hand. It means you can hold your camera in one hand and remove the filter with the other or you can hold the case in one hand, ready to just slip the filter straight in.
Again, it seems like a tiny change, but the quality of life and workflow benefit it provides is definitely noticeable. With the M10, I’d often just leave it attached to the camera because it was too much of a hassle to keep taking it on and off, but with the M10 II, you can do it without thinking about it very easily.
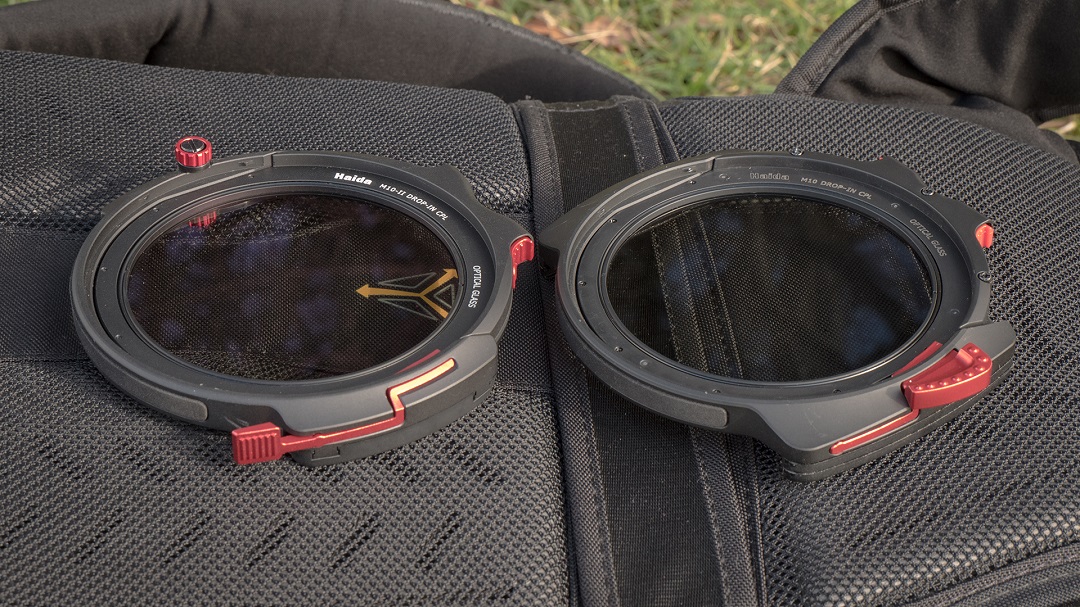
The Haida M10 II (left) has essentially flipped the lever around compared to the M10 (right).
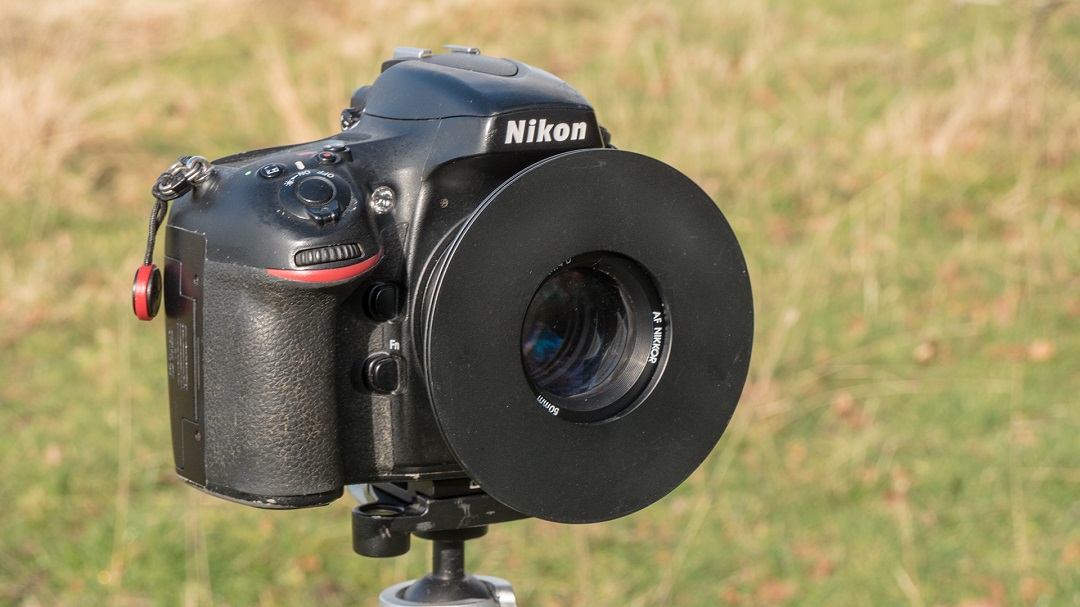
Other than that, using the M10 II was pretty much the same as using the original M10. The drop-in filters slot in and out as they did before (sort of – we’ll get to that), and so do the square filters. And once you’ve got your filters in, you just shoot how you normally would when using any other filter holder system.
THE SECOND CHANGE – LOCKING THE RING
The second big change on the Haida M10 II over the original M10 is that you’re actually able to fully lock the holder in place on the ring. That’s not to say that it’s going to fall off without it, because both the original M10 and the M10 II hold very well when attached to the adapter ring, but the M10 II allows you to lock the rotation.
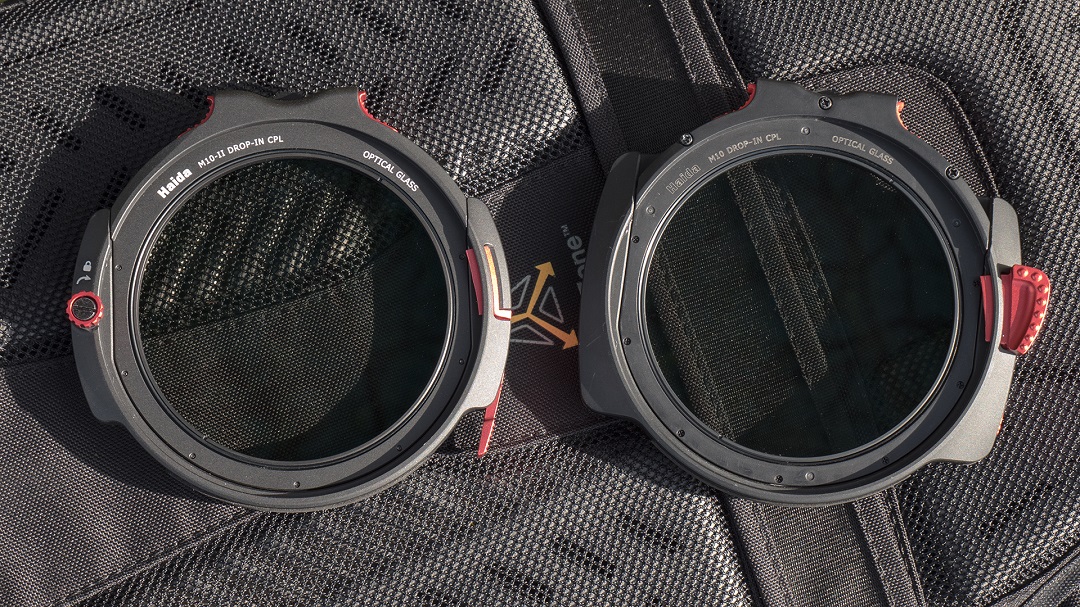
The Haida M10 II (left) sports a locking knob to prevent accidental rotation when using ND grads or the Haida Insert Variable ND.
Why is this a big deal? Well, if you’re using graduated neutral density (ND grad) filters to help balance out the sky with the ground, or you’re using them at a funny angle in order to be able to match a treeline or a mountain or some other landscape feature, you can lock that rotation in place so that you don’t accidentally knock it and adjust the angle without realising it.
Accidentally adjusting the angle is pretty easy to do when you can’t really see what you’re shooting – and if you’re using an infrared filter or a 10-stop ND, then not being able to see what you’re shooting can happen more often than not.
It also means that if you’re using the Haida M10 Insert Variable ND Filter along with the drop-in circular polariser, you can adjust both the strength of the neutral density as well as the polarising angle without having to worry about things slipping.

Shot using the new metal-framed Haida 10-stop drop-in ND filter for the M10 II (but it also works with the M10).
If you’re only using the drop-in polariser and regular square neutral density filters, IR, etc. where rotation doesn’t matter then it’s not a massive feature. But the landscape shooters who utilise ND grads or Haida’s Variable ND Filter combo will find this feature absolutely invaluable.
THE THIRD CHANGE – METAL DROP-IN FILTERS
One of the other things that changed with the Haida M10 II is that the drop-in filters now all feature a metal frame instead of the plastic frame of those with the original Haida M10.
Like the adapter rings to screw onto the end of your lens, though, both the older plastic frame filters and the newer metal frame filters slot perfectly into both the original M10 and the M10 II. So, whichever combo you have, they’ll work together just fine.
The new metal frames mean they’re much more durable than the original frames and you’re still able to get the entire range, including ND, CPL, CPL+ND, Grad ND, Clear Night, IR720 and Mist Black. Of course, again, the regular CPL does come supplied with the Haida M10 II, as it did with the original M10.
The drop-in CPL that comes with the M10 II is essentially identical to that of the original M10, complete with dial for adjusting its rotation angle. The only difference is that this one has a metal frame.
I’m 50/50 on this design change, though. Why? Well, I’ve never really found durability to be much of an issue with the plastic frames. Sure, being plastic there is more potential for them to get damaged, but that’s all it is. Potential. Plus, they don’t seem to slide in and out quite as smoothly as the original plastic-framed drop-in filters do.
Whether it’s the unwavering lack of bendiness of the metal frames or the plastic-on-metal action is just naturally smoother, I’m not sure, but you had a little wiggle room with the plastic frames if your angle was just slightly off and they just slid right in and out with ease. The metal-framed filters have to be positioned and angled just perfectly to slot in the first time, every time.

Shot using the new metal-framed Haida IR720 drop-in infrared filter for the M10 II (but it also works with the M10).
It’s not a deal-breaker, obviously, and it is something you get used to. If you’ve never used Haida’s original M10 and the plastic-framed filters then it might not even be an issue for you, but if you are an owner of the M10 or the original plastic-framed drop-in filters, it’ll take a few trips out to get used to it.
THE LAST CHANGE – SMALL, BUT SIGNIFICANT
One last change between the M10 and the M10 II is the felt that sits at the front of the ring behind the first square filter slot. While I never found that I was getting light leaks with the original M10 holder, the felt on the M10 II is a much thicker band.

The felt can pick up dust even more easily than the filters themselves, so be sure to give them a clean to make sure they haven’t attracted abrasive dirt!
This should not only help to minimise the chances of any light leaks but it should also help to knock any dust off the near side (as you stand behind the camera) of the filter itself. You’ll still want to make sure your filters are as clean as possible, though. If a tiny speck of a stone gets caught in here, it does have the potential to scratch your glass. So, give them a blow with a rocket blower first to make sure there’s nothing big stuck on there.
The felt here does have a tendency to pick up bits of dust, fine hairs and other assorted bits, as you can see in the photo above, so do be sure to give those a clean, too, before slotting in your square filter.
CONCLUSIONS
The Haida M10 II is now my new go-to filter holder system. Everything I loved about the original M10, I love about this one, but more so because of the new features – more specifically, the “push” lever rather than the “pull” one and the included lens cap. I’ve still got my original Haida M10 kit but it will now join all the other holders I’ve picked up over the years in the long-term storage bag as a backup or a spare in case I’m ever heading out with somebody else who needs to borrow one.
So, if you already own the original Haida M10 filter system, is it worth going out and upgrading to the Haida M10 II right now? This is a tough one to answer and it may boil down to personal preference. The original M10 was pretty good and it’s still just as good as it always was. If you’re absolutely 100% happy with the original, then stick with it. That being said, if you think that any of the changes made to the M10 II mentioned above will be beneficial to you and you can justify going out and spending the money right now, then go for it.
As with the original Haida M10, the M10 II is a very well thought out system with some nice improvements.
If you do upgrade, you won’t need to buy new adapter threads for it, you can keep using the same ones you already own. And despite the new metal-framed drop-in filters now being a thing, the M10 II fits all your existing plastic-framed drop-in filters, too. So, the only thing you’d really need to buy is the holder itself.
If you’ve not yet bought into a square filter holder system yet, or if you decided to stick with your M10 and it ever gets lost or damaged and needs replacing, then the Haida M10 II filter kit is absolutely worth going for over the original M10 – assuming you can still even find the original M10 for sale anywhere by the time you read this review. They’re still available at the time of publication, and while they’ve dropped a little in price since their initial release, I think the slight extra cost of the M10 II kit is worth it.
The Haida M10 II 100mm Filter Kit with 77mm adapter ring is available to buy now for $224 and is shipping now. The Haida 10-stop drop-in ND filter is available to buy now for $89 and the Haida IR720 drop-in infrared filter is available to buy now for $107.
Related News
- THE HAIDA M10 II FILTER SYSTEM BRINGS SOME NICE WORKFLOW IMPROVEMENTS OVER THE O
- Haida NanoPro Magnetic Filter & Filter Kit for Insta360 Luna Ultra
- Haida NanoPro Magic Mist Black 1/4 Filter
- Haida NanoPro U-LR C-POL Filter
- Haida NanoPro U-LR Magnetic X in 1 Filter
- Haida NanoPro Filter Kit for DJI Osmo Pocket 4P